Organize Through Groups; Also Smart Filters
Let's learn how to organize our work by making groups and placing layers within.
Photoshop groups work just like folders; in fact, their icon even looks like a folder!
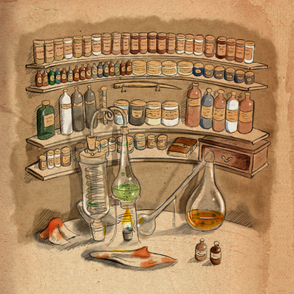
First, here is a file from a friend of mine. She didn't label any of her layers, and now, she is in serious trouble.
Photoshop groups work just like folders; in fact, their icon even looks like a folder!
First, here is a file from a friend of mine. She didn't label any of her layers, and now, she is in serious trouble.
| old_medicine_man.psd |
Poor girl. What a mess! ;)
Your job is to do the following:
1. Relabel all the layers with something meaningful, so she will know what she is doing.
2. WITHOUT CHANGING the order of the layers, create some folders to bring some order into this mess and organize the files into these folders.
3. Make sure the background is not inside a folder.
To relabel the layers, just double - click on the layer name and give it a meaningful name.
To create folders and make sure you keep organized, click on the folder icon on the bottom of the layers panel:
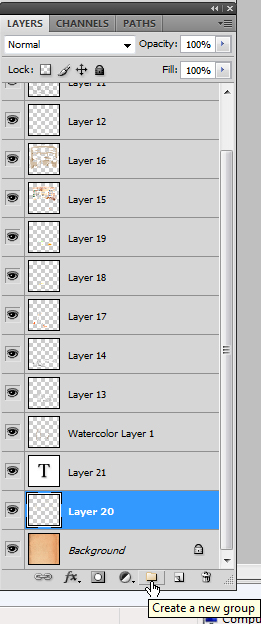
Make sure to LABEL your folders something meaningful.
To drag layers inside folders, you will simply click to select and drag the layers you want to your folders.
After you are all done organizing the layers into folders, you should try to improve on this layer.
You need to add:
To refresh your memory, here is what the adjustment layers panel looks like:
To drag layers inside folders, you will simply click to select and drag the layers you want to your folders.
After you are all done organizing the layers into folders, you should try to improve on this layer.
You need to add:
- Two adjustment layers
- Inner shadow to the background layer
- A grain filter by using smart filters
To refresh your memory, here is what the adjustment layers panel looks like:
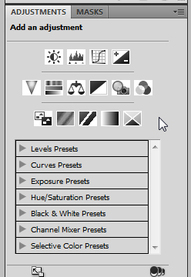
You can also find it by clicking the half-moon icon below the layers panel.
Now, a smart filter is a little different than simply applying a filter to your layer.
A smart filter can be adjusted and modified, or omitted, so it is a non-destructive way to go.
First thing you will do is make sure all your elements are merged into a new layer. For this step, you can select everything, even the background layer. It will look nicer in this case.
Remember that you need to do the Alt trick in order to merge your visible layers into a new layer, so you can apply your grain to a new layer!
AFTER you have your layers merged into a new layer, move it to the TOP of the stack, and convert this layer into a smart object.
To do this, right-click on your layer and select Convert to Smart Object.

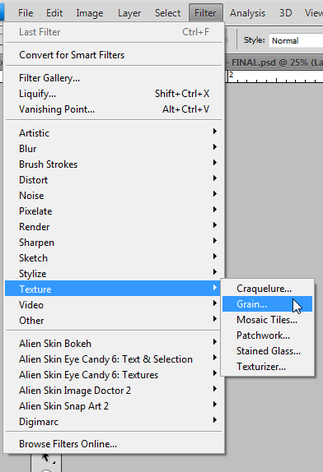
Now, with your new Smart Object layer still selected, you can go ahead and add a grain filter to it. This filter will be modifiable, and you can also remove it. You can do this with any individual layers in the future as well! The sky is the limit.
Below, a reminder on where to find Grain:
Below, a reminder on where to find Grain:
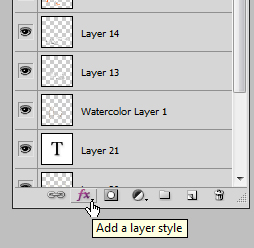
Finally, here is where you will find the inner shadow:
If you have any ideas or want to try any effects to modify this image, go ahead! Have fun with it.
That was it for this extra! Hope it was an interesting process.
Now, if you are done, you should show Mrs. J your work!
Then, you can click on the link below for another tutorial, where you will learn how to merge two photos into one for a smashing effect.
It will also reinforce your knowledge of layer masks:
Tutorial on merging two photos
