Extra 2 - Mount Rushmore Face Replacement

In this quick extra, we will learn how to replace faces.
This is not a super perfect tutorial, but it does make a good point.
A lot of replacing faces successfully depends on matching the colour and tone of your replaced head to the existing scenery, as well as the brightness and contrast.
It also depends on matching the pixelation or sharpness of the photos. Your result will be only as good as your sources.
We will be attempting our matches in this tutorial by using ADJUSTMENT LAYERS -- namely, the HUE AND SATURATION and the BRIGHTNESS/CONTRAST adjustment layers.
While this is more of a "match tones of sepia" game, you can do this for matching skin tones as well.
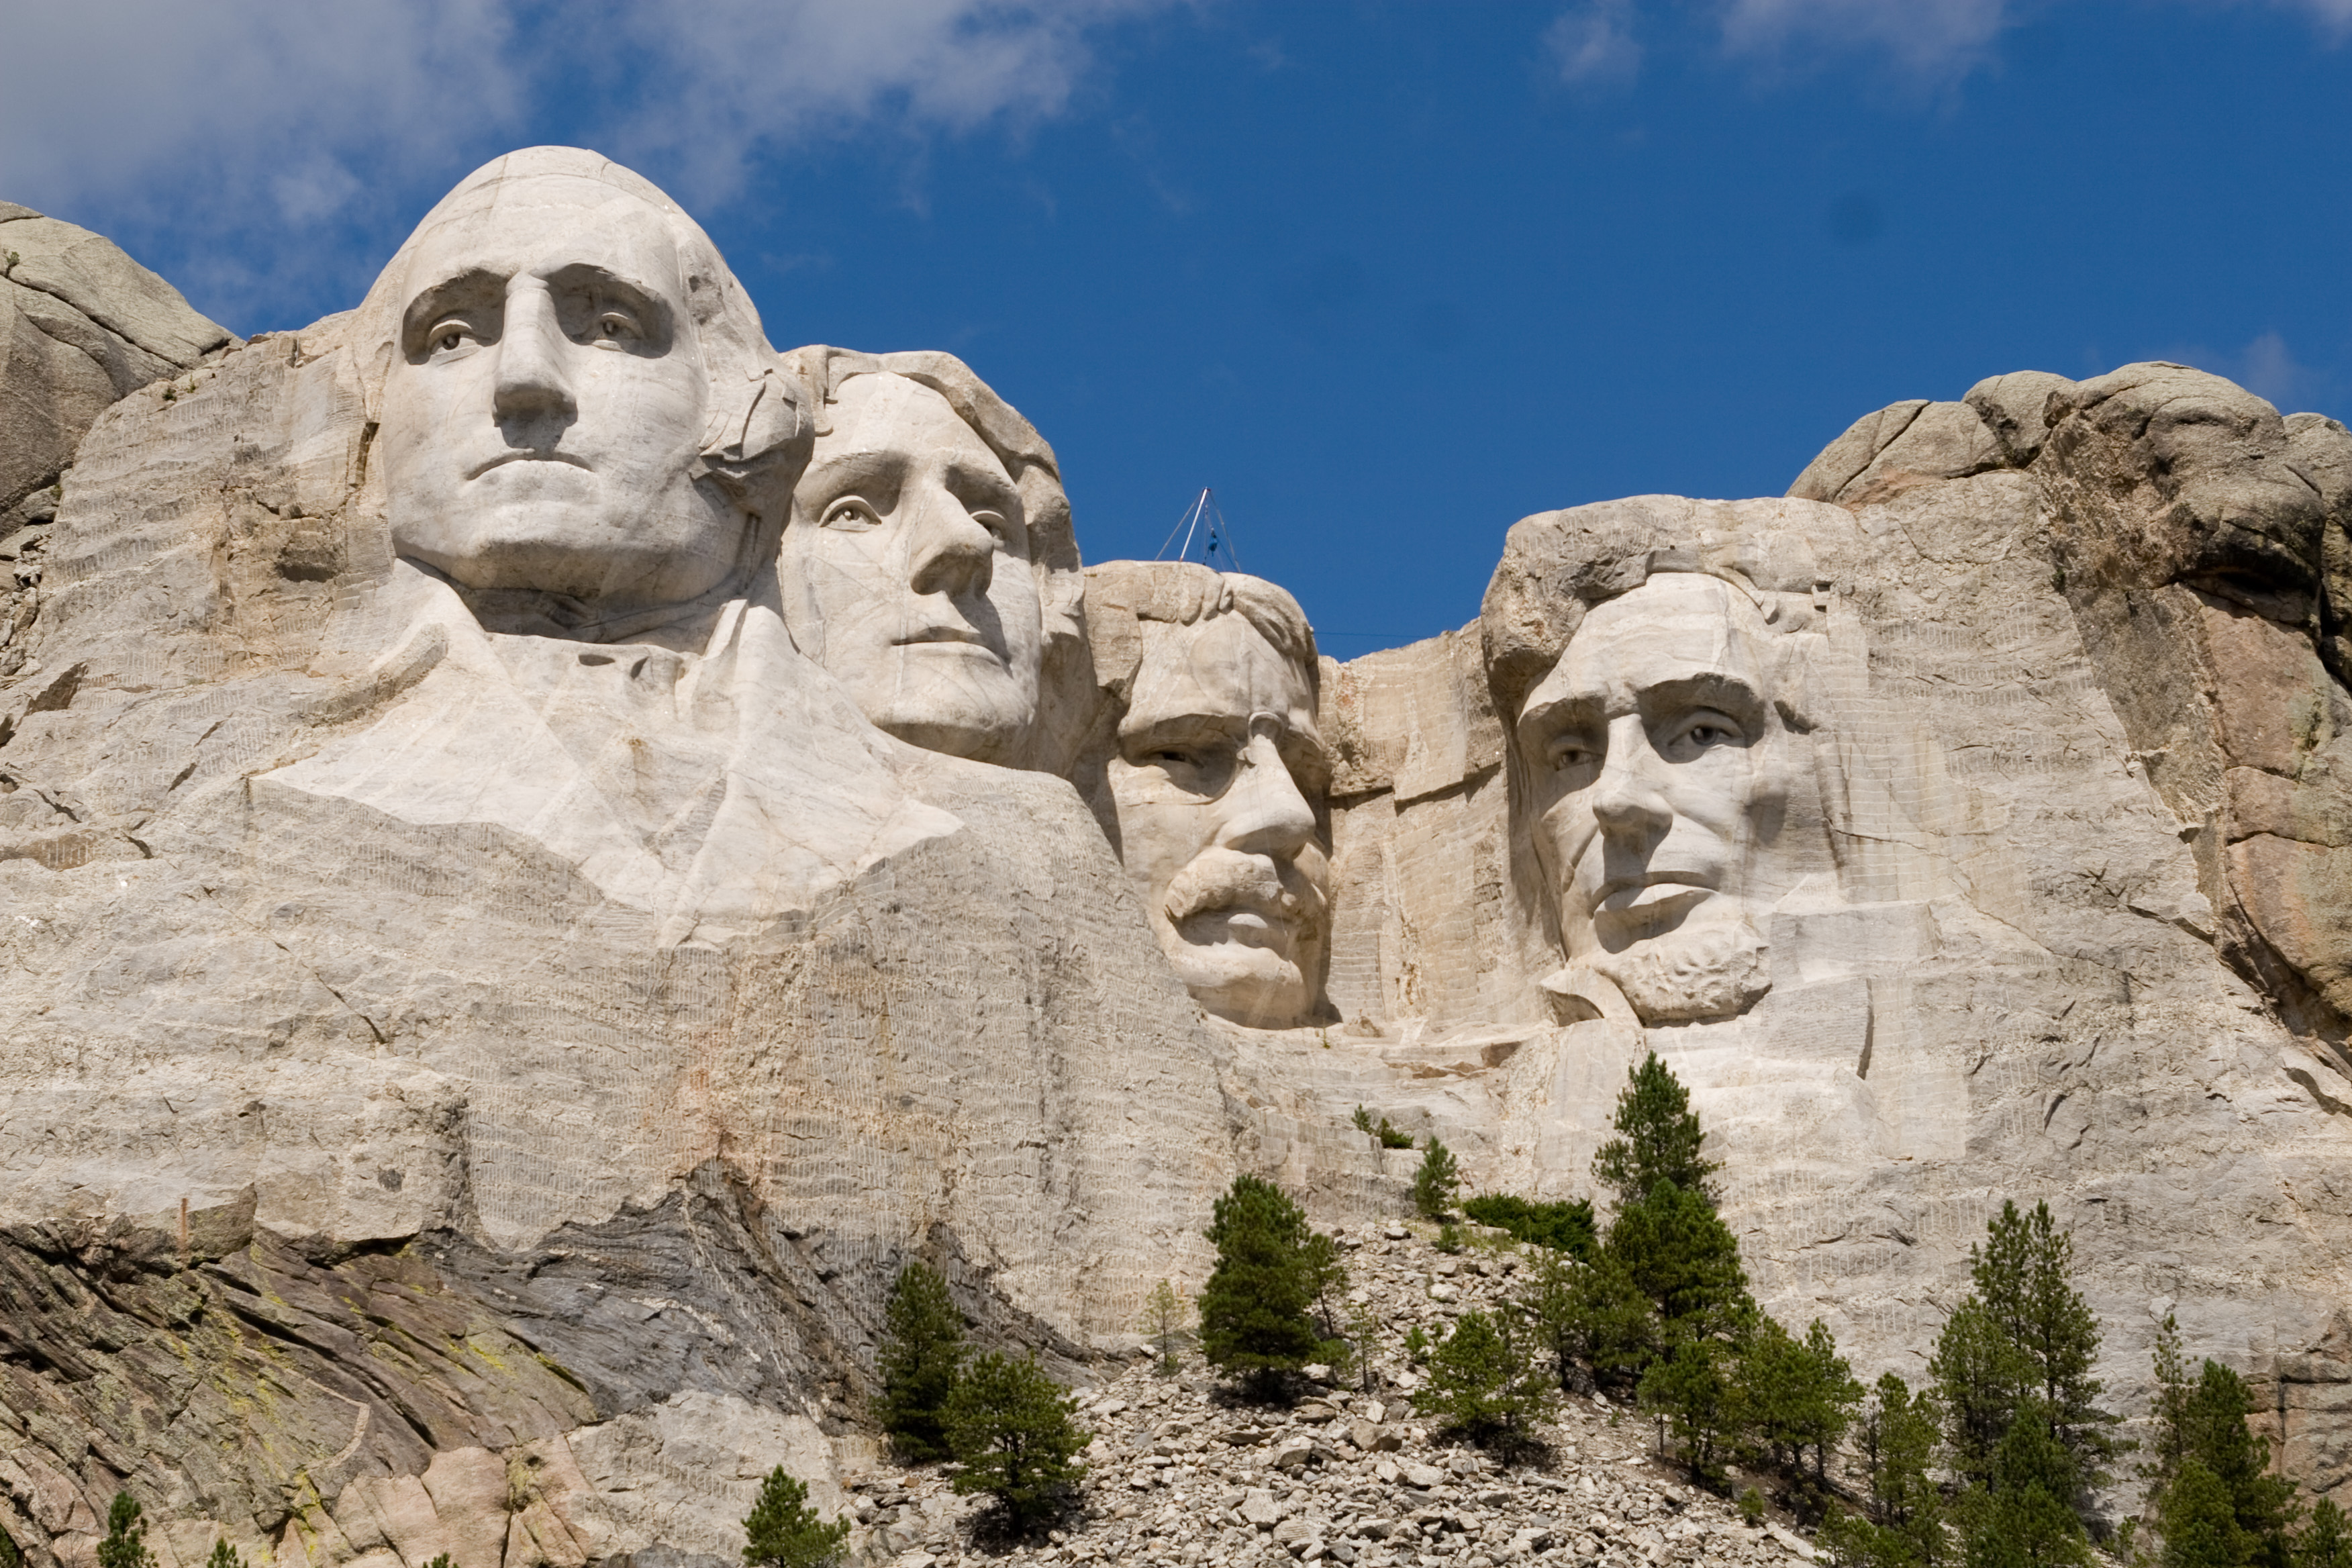
First, download the picture below.
This is not a super perfect tutorial, but it does make a good point.
A lot of replacing faces successfully depends on matching the colour and tone of your replaced head to the existing scenery, as well as the brightness and contrast.
It also depends on matching the pixelation or sharpness of the photos. Your result will be only as good as your sources.
We will be attempting our matches in this tutorial by using ADJUSTMENT LAYERS -- namely, the HUE AND SATURATION and the BRIGHTNESS/CONTRAST adjustment layers.
While this is more of a "match tones of sepia" game, you can do this for matching skin tones as well.
First, download the picture below.
| mount_rushmore_1.jpg |
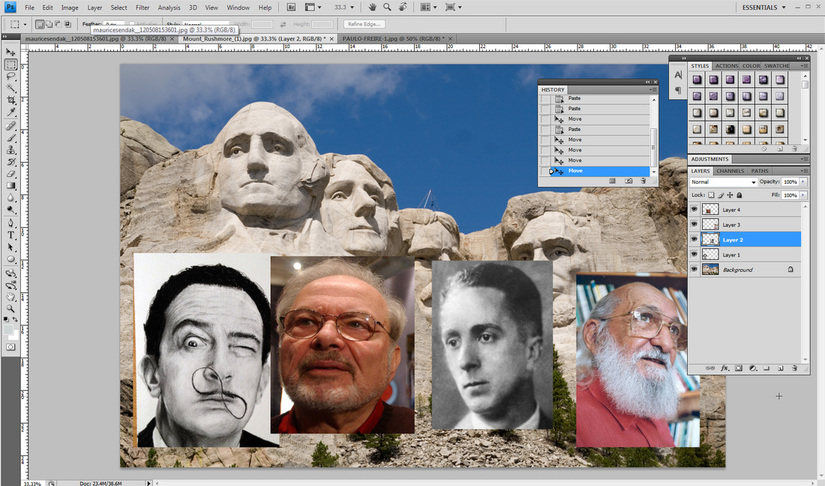
Now, on Google, search for images of four people who you would like to see on Mount Rushmore. I chose Salvador Dali, Maurice Sendak, Norman Rockwell and Paulo Freire.
My original pictures were very different from what I needed to match.
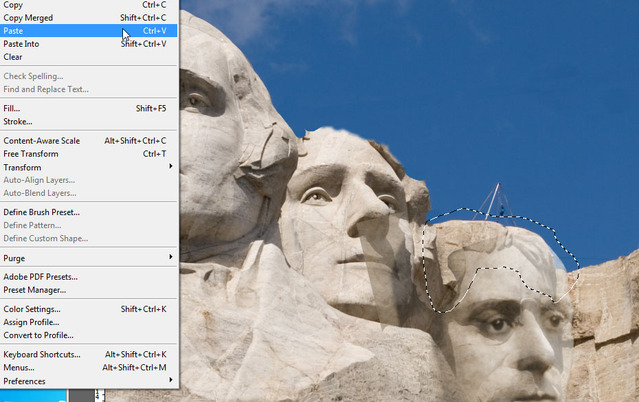
First, I OPENED mount rushmore (above).
Then, I opened all 4 of my pictures, selected the faces, copied and pasted onto my mount rushmore picture.
This is what I got:
My original pictures were very different from what I needed to match.
First, I OPENED mount rushmore (above).
Then, I opened all 4 of my pictures, selected the faces, copied and pasted onto my mount rushmore picture.
This is what I got:
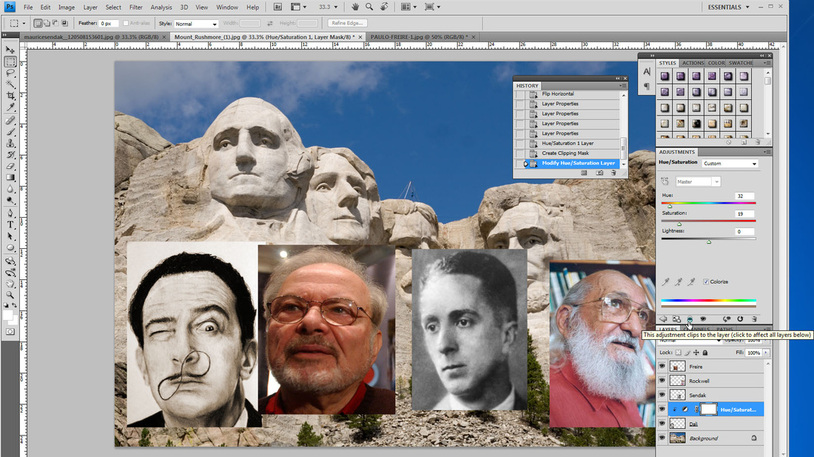
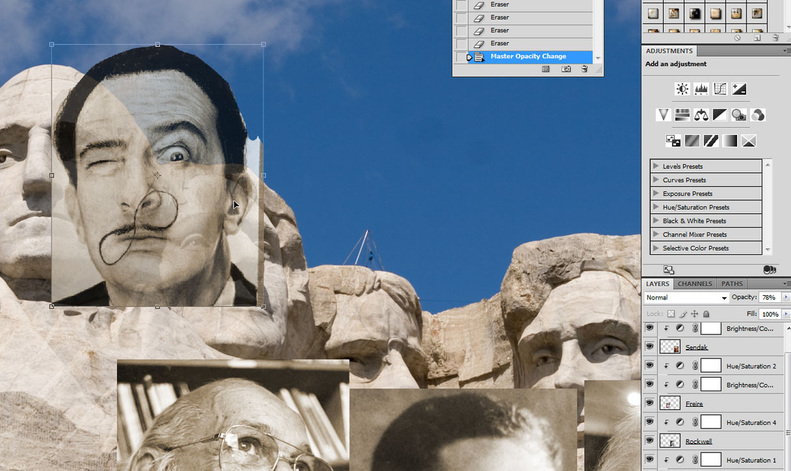
I started with the face on the very left, Salvador Dali.
I flipped the layer using edit -> transform -> flip horizontal.
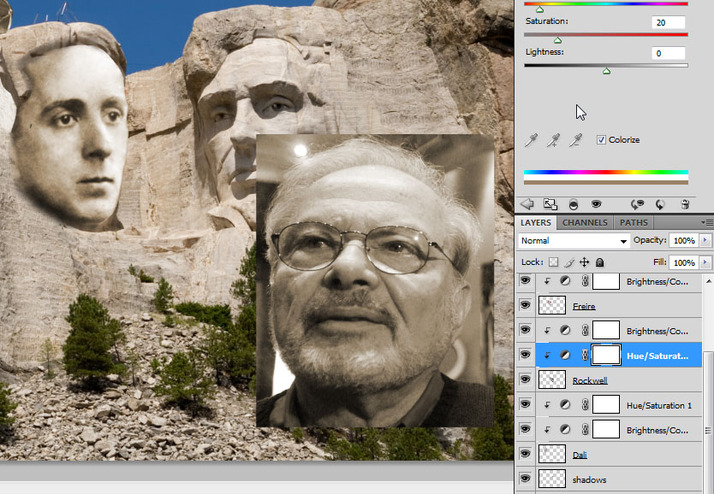
Then, I added a hue and saturation adjustment layer, but I clipped it to that layer only.
I colorized it and played with the settings until I had something close to the mountains.
This works for everything... adding faces to anywhere. Except you won't be colorizing normally.
Clipping it to the layer means that the adjustment only affects the layer directly below.
This is what I got:
I flipped the layer using edit -> transform -> flip horizontal.
Then, I added a hue and saturation adjustment layer, but I clipped it to that layer only.
I colorized it and played with the settings until I had something close to the mountains.
This works for everything... adding faces to anywhere. Except you won't be colorizing normally.
Clipping it to the layer means that the adjustment only affects the layer directly below.
This is what I got:
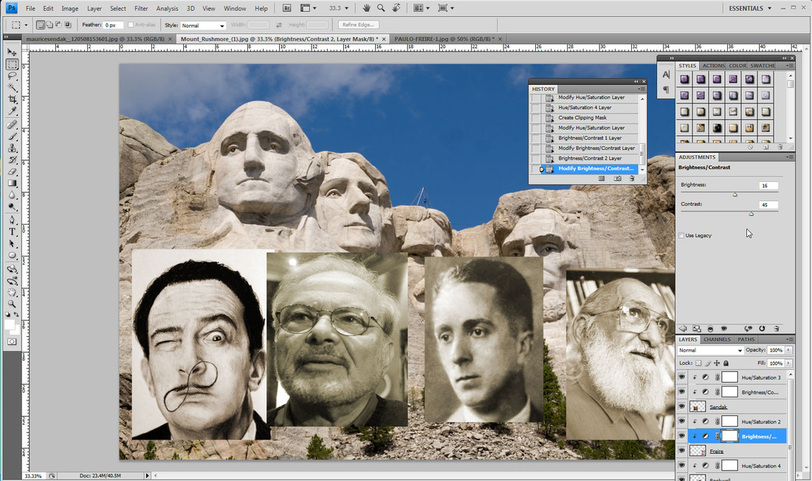
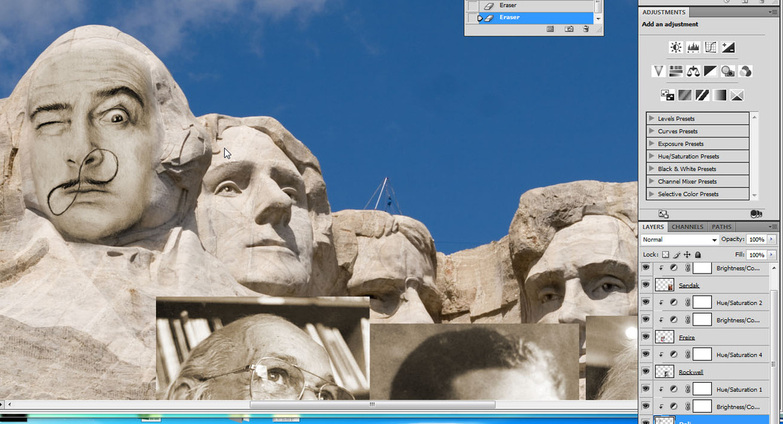
Then I labeled my layers, so I wouldn't get confused.
And I added more adjustment layers to my other people; I added hue and saturation layers, as well as Brightness/contrast layers.
I made sure to clip them, so they would only affect the layer directly below.
This is what I got:
And I added more adjustment layers to my other people; I added hue and saturation layers, as well as Brightness/contrast layers.
I made sure to clip them, so they would only affect the layer directly below.
This is what I got:
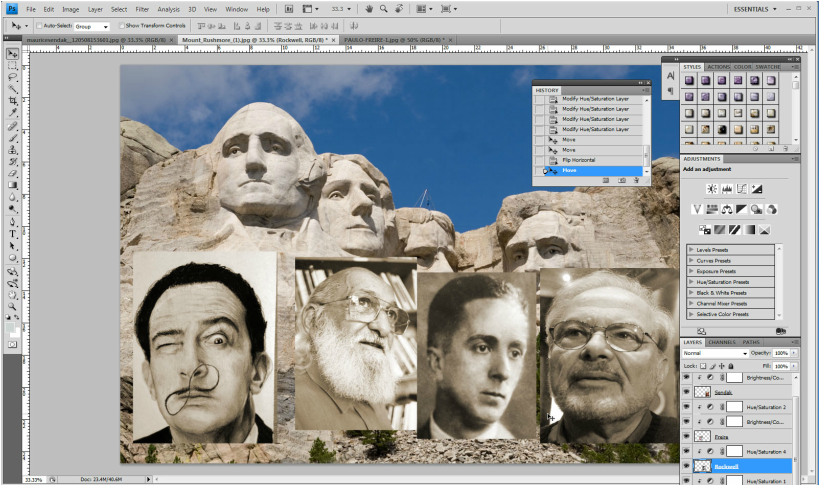
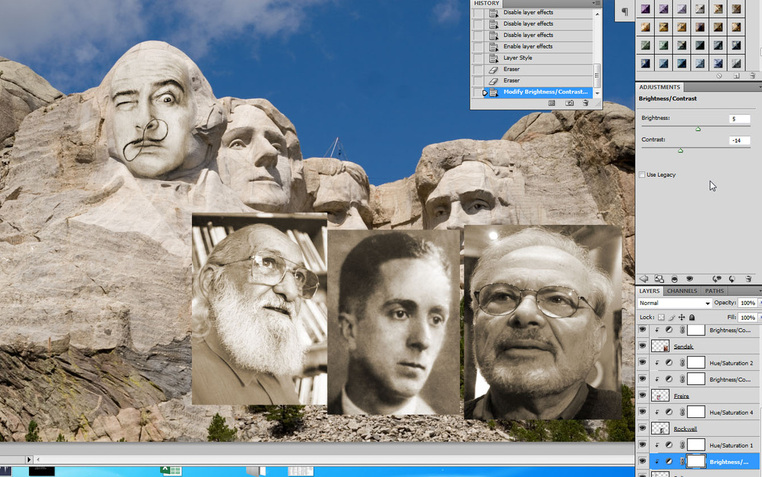
Then, I fiddled with the adjustment layers until the faces matched in colour and tone a little better.
I also moved the images' positions so that they would look better on the mountain.
I got this:
I also moved the images' positions so that they would look better on the mountain.
I got this:
Starting with Dalis' layer, I changed the layer opacity to ensure that I could resize and angle the face just the way I wanted, considering the face underneath:
I liked the hairline, and so I wanted them to blend pretty well, as well as blending the chin to the mountain below.
So, I used my eraser with a very low hardness (fuzzy edges) and erased softly all around the face.
It looked like this:
So, I used my eraser with a very low hardness (fuzzy edges) and erased softly all around the face.
It looked like this:
I adjusted the brightness and contrast again, and now it looks much more like the rest of the mountain:
The results look good!
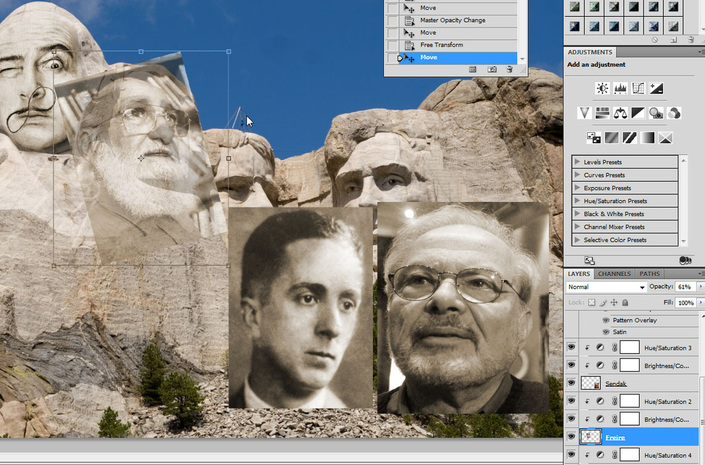
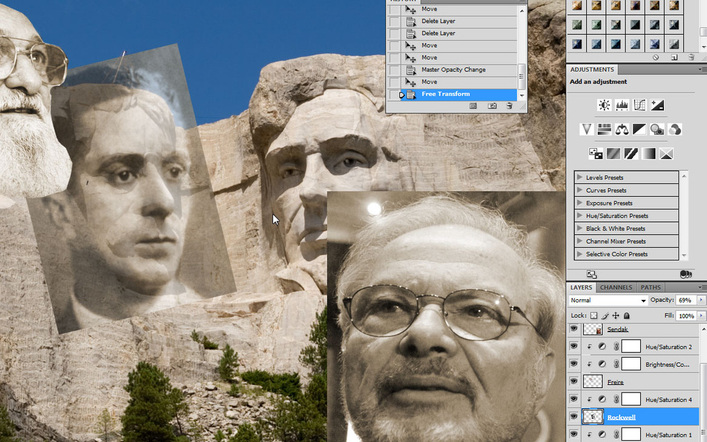
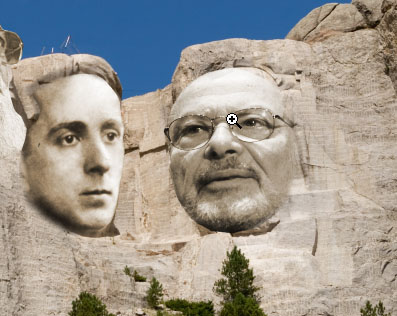
On to the next face. I reduced the opacity of Paulo Freire's layer and rotated him (edit -> transform -> rotate )as well as resized him until I was happy with the result.
Make sure to lock the ratio so that your faces are reduced proportionally.
On to the next face. I reduced the opacity of Paulo Freire's layer and rotated him (edit -> transform -> rotate )as well as resized him until I was happy with the result.
Make sure to lock the ratio so that your faces are reduced proportionally.
I decided I really like his bald head. I will be keeping it, and cloning the mountain below to make the hair in the original picture disappear -- kind of like we did with the head of the girl on the beach tutorial. To make the edges of his head sharp, I used the eraser with a high hardness (NOT a soft edge brush) to make his head look really sharp against the sky.

There, the cloning tool used on the background layer does a really good job:
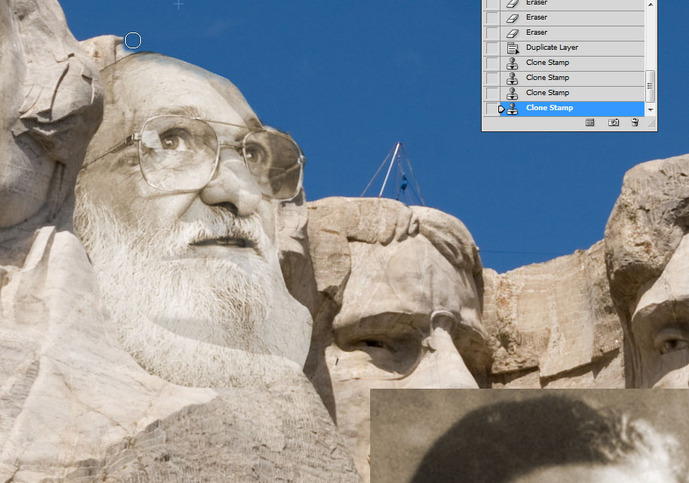
I put the layer opacity back to 100% and play with my eraser with a SOFT edge, until I am happy with the blending of his beard onto the mountain below:
Next face. This one has a very tall forehead. I do the same process of adjusting size and angle:
I erased around his head with a sharp brush, as well as erased the portion under the beard on the left with a hard brush. I erased around his face with a soft brush.
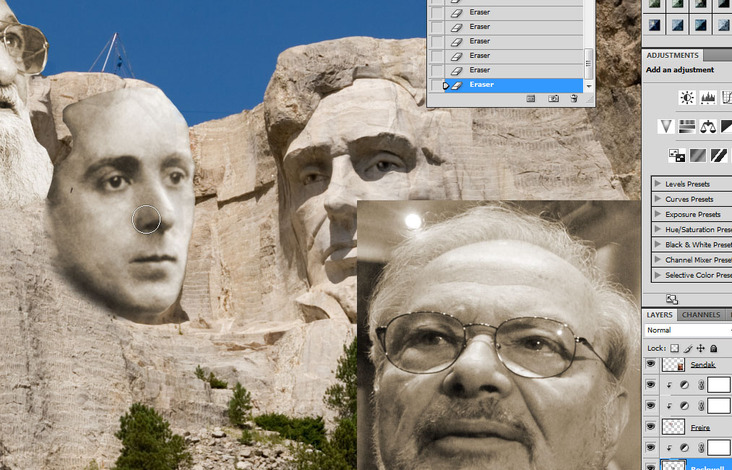
I copied the hairline from the mountain below and pasted underneath the face's layer:
Then, I changed the hair by rotating and scaling it until I was happy with the result:

Increasing the layer's opacity back to 100%, I added a shadow layer below the face and shaded a little bit the hairline directly below the face. I also made sure the hue and saturation matched the rest of the mountain:
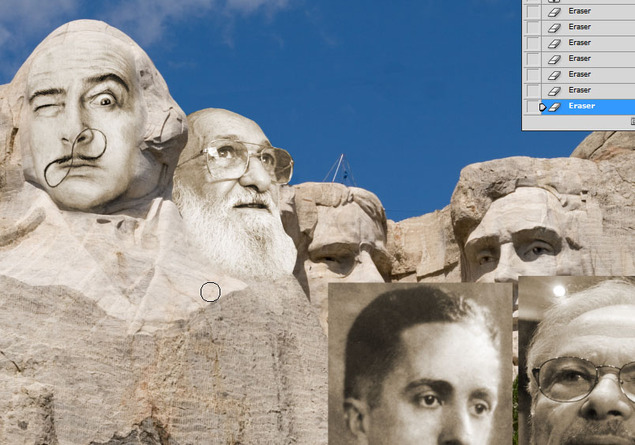
Sendak was the last one. I followed the same process, erasing his hair and matching his colour and brightness:
The end result is as follows:
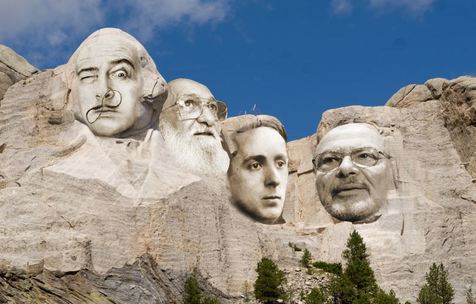
As you can see, while Dali worked pretty well (leftmost picture), the third head (Rockwell) is the least successful.
The reason is, the original picture was very old and poor in detail.
So, make sure to try for the closest you possibly can.
In the following picture, for instance, can you tell who was not in the original picture?
The reason is, the original picture was very old and poor in detail.
So, make sure to try for the closest you possibly can.
In the following picture, for instance, can you tell who was not in the original picture?
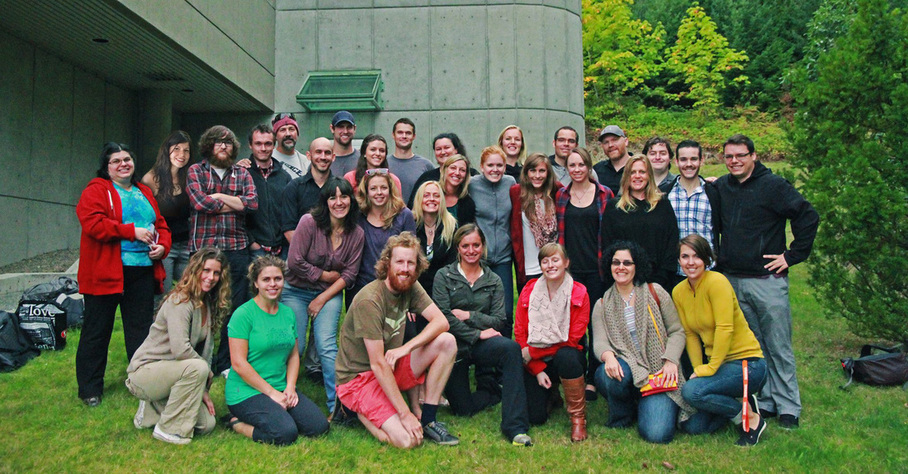
If you said the second girl from the left, you were right.
The lightning is not the best match, but it was all I had to work with. Sometimes, you have to try your best, and just go with it.
By cloning the layers below the girl, I was able to make the person underneath disappear.
I also used the legs from the person underneath to help ensure the new girl matched as close as possible to the original.
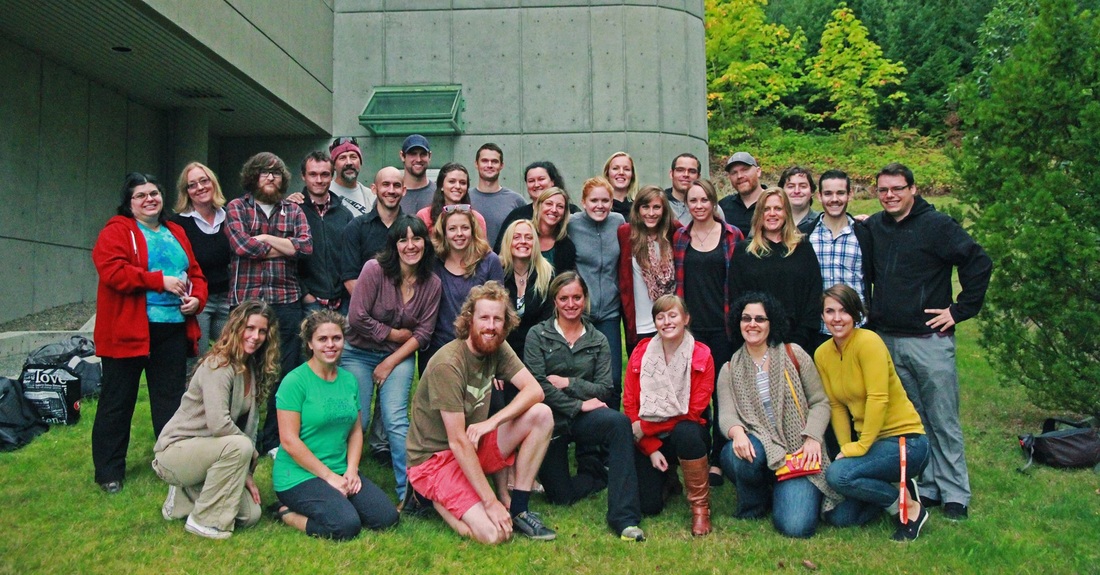
This was the original photo:
The lightning is not the best match, but it was all I had to work with. Sometimes, you have to try your best, and just go with it.
By cloning the layers below the girl, I was able to make the person underneath disappear.
I also used the legs from the person underneath to help ensure the new girl matched as close as possible to the original.
This was the original photo:
You can also use these methods -- cloning, layer adjustments and erasing -- to match the faces on photographs.
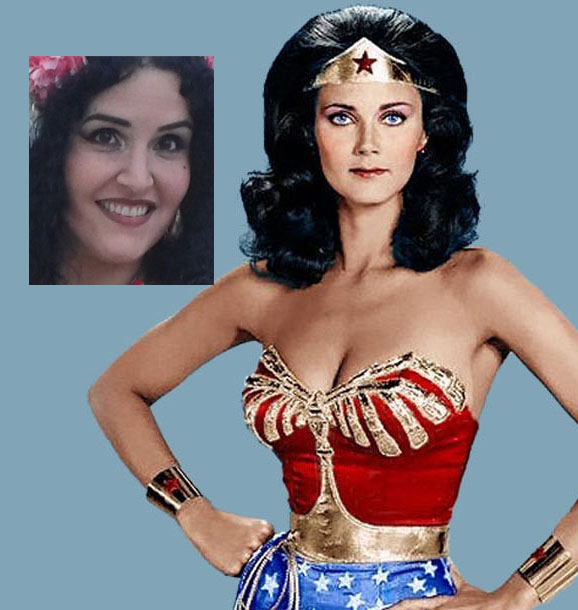
For instance, look at how different the two faces below are in terms of colour, brightness and contrast.
It almost looks impossible to match these two:
For instance, look at how different the two faces below are in terms of colour, brightness and contrast.
It almost looks impossible to match these two:
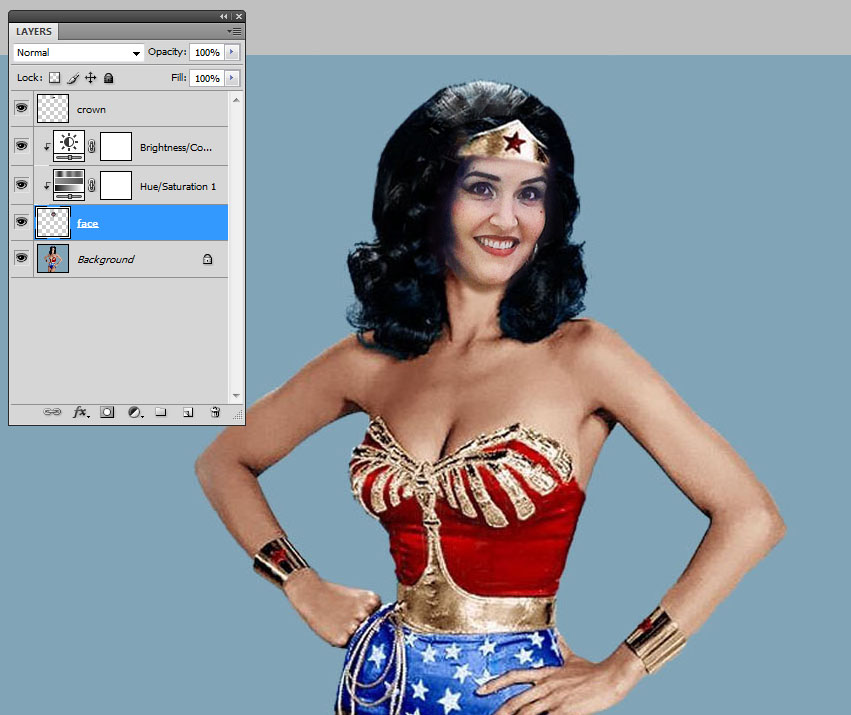
In a very short time, I modified the picture so the heads match.
First, I reduced the opacity of my head layer to find a good spot for it:
First, I reduced the opacity of my head layer to find a good spot for it:
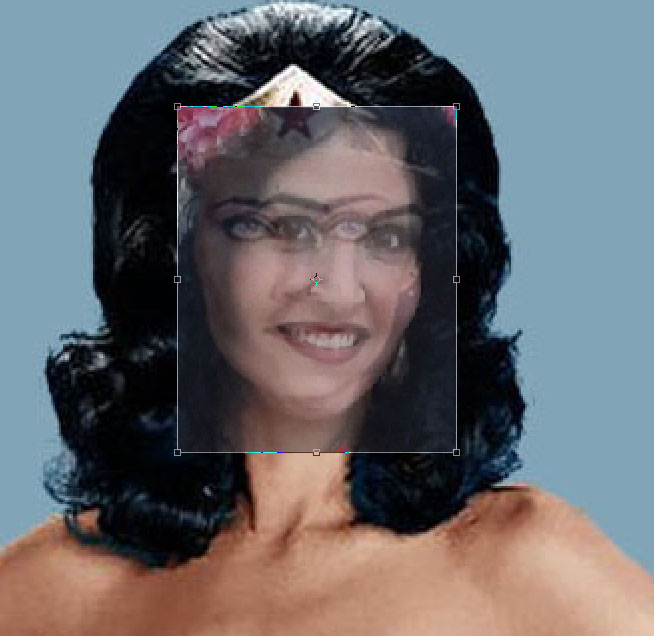
Then, I copied and pasted the crown to a new layer on top of my face.
I cloned the hair so it would cover the face underneath.
I also used the filter liquify to tilt the hair ever so slightly to the right, to create the illusion that the hair matched my face.
Finally, I used two adjustment layers -- brightness and colour, and hue and saturation -- to achieve a colour that was a close match to the original. I made the face much more yellow, with a much higher contrast and saturation.
I could have played with it a little more, to make the crown look really realistically on the head, and also smooth the neck junction, but...
It's already a big difference, don't you think?
It's your turn! Go ahead and find some heads to replace. Have fun!
